
Fix Wobbly Chair Joints: The Complete Guide to Antique Chair Repair
Estimated read time: 10 minutes
Few things are more frustrating than sitting in a beloved antique chair only to feel it sway and creak beneath you. If you need to repair loose joints in antique chairs and fix a wobbly chair that has been in the family for generations, you are not alone — and the good news is that this is one of the most rewarding DIY fixes a homeowner can tackle. Antique chairs are built from solid wood with mortise-and-tenon or dowel joints that, over decades, dry out, shrink, and loosen. The wobble you feel is almost always a structural problem rooted in dried glue and slightly shrunken wood — not a sign that the piece is beyond saving.
The craftsmanship in antique chairs is genuinely remarkable. Many pieces dating from the 18th and 19th centuries were assembled with animal-hide glue, which is reversible with moisture and heat — a fact that works very much in your favor during restoration. Unlike modern furniture that uses staples, cam locks, and particle board, antique chairs are designed to be disassembled and rejoined. That means a careful, methodical repair will not only stop the wobble but can restore the chair to structural integrity that rivals the day it left the workshop.
In my experience, the biggest mistake people make is reaching for a tube of hardware-store wood glue, squeezing it into a joint without any preparation, and clamping it overnight — only to find the wobble returns within weeks. A proper repair takes a little more patience, but the results are lasting. This guide walks you through every stage: diagnosing the problem, gathering the right tools, choosing the correct adhesive, executing the repair, and maintaining the chair so the joints hold for decades to come.
Diagnosing a Wobbly Chair: What’s Really Going On
Before you pick up a single tool, spend five minutes carefully testing every joint on the chair. Grip each leg near the seat and apply gentle lateral pressure. Note which joints flex and which feel solid. Then check the rear legs separately — these are almost always the first to loosen because they bear the greatest torque when someone leans back. Run your fingertips along every joint line; if you feel a gap or find dried flakes of old glue crumbling out, you have found your problem area.
Most antique chair joints fall into two categories: mortise-and-tenon joints (where a rectangular tongue of wood slides into a matching slot) and dowel joints (where a wooden cylinder is glued into holes in both pieces). Stretcher joints — the horizontal rungs connecting chair legs — are particularly prone to loosening because they experience constant stress without direct weight to keep them compressed. On Windsor chairs and ladder-back designs, it is common to find every single stretcher-to-leg joint loose simultaneously, especially if the chair has spent decades in a centrally heated home where winter air is very dry.
According to the Library of Congress Preservation guidelines, the most common cause of joint failure in antique furniture is not mechanical stress but rather seasonal wood movement caused by fluctuating indoor humidity levels. Keeping a room between 45–55% relative humidity significantly extends the life of wood joints.
Once you have identified every loose joint, mark them with small pieces of painter’s tape. This prevents confusion once you begin disassembly. Photograph the chair from multiple angles before you touch anything — especially if the piece has an unusual joinery arrangement. A quick phone photo is the cheapest insurance against reassembly errors.
Tools and Materials You’ll Need
A successful chair joint repair does not require a professional workshop, but having the right supplies on hand before you start makes a real difference in the quality of the result.
Essential Tools
- Rubber mallet — for tapping joints apart without damaging the wood
- Band clamp or web clamp — essential for applying even pressure to a chair’s four legs simultaneously
- Bar clamps or pipe clamps — for individual joints and wider spans
- Wooden blocks or cork pads — to protect the wood surface under clamp jaws
- Sharp chisel or dental pick — for cleaning old glue from mortises and tenons
- Heat gun or hot-water damp cloth — to soften hide glue on antique pieces
- Sandpaper (120 and 220 grit) — for lightly abrading joint surfaces before regluing
- Stiff toothbrush or small wire brush — for scrubbing loose adhesive from deep recesses
- Mixing sticks and small brushes — for applying glue precisely
Materials
- Wood glue (hide glue, PVA, or epoxy — see the glue section below)
- Cotton string or thread (for building up a loose tenon)
- Wood shims or slivers (for severely worn tenons)
- Toothpicks or wooden skewers (for filling oversize dowel holes)
- Wax paper (to protect surfaces from glue squeeze-out)
- Rags and mineral spirits (for cleanup)
A band clamp (also called a web clamp) is by far the best investment for chair repair. It wraps all four legs in a single loop and applies even, balanced pressure as the glue sets — something four individual clamps can never replicate. A good band clamp costs under $20 and will be used on nearly every chair repair project you undertake.
Cost Breakdown: Budget to Premium
One of the best aspects of antique chair joint repair is how affordable it is compared to professional restoration fees, which can run $150–$400 for a single chair. Here is a realistic overview of what you might spend depending on the approach you take.
| Item | Budget Option | Mid-Range Option | Premium Option |
|---|---|---|---|
| Wood Glue | Titebond Original PVA — $7 | Old Brown Glue (liquid hide glue) — $18 | Franklin International hide glue granules — $22 |
| Band / Web Clamp | Generic 15ft band clamp — $9 | Irwin Quick-Grip band clamp — $19 | Bessey band clamp set — $38 |
| Bar Clamps (2 pack) | Harbor Freight 6″ clamps — $8 | Irwin 12″ bar clamps — $22 | Bessey 12″ F-clamps — $45 |
| Chisel & Cleaning Tools | Utility knife + wire brush — $5 | Narex 3/4″ bench chisel — $18 | Two Cherries chisel set — $55 |
| Thread / Shims for Tenon Rebuild | Cotton thread from sewing kit — $0 | Veneer tape strips — $6 | Pre-cut walnut shims — $12 |
| Estimated Total | ~$29 | ~$83 | ~$172 |
For most homeowners tackling a single chair repair, the mid-range option gives the best balance of professional results and reasonable cost. The premium tools are worth the investment only if you plan to restore multiple pieces — which, once you have completed one successful repair, you almost certainly will.
Step-by-Step: How to Repair Loose Joints in Antique Chairs
Work in a clean, well-lit space with a drop cloth on the floor. Temperature matters too — wood glue performs best between 55°F and 75°F, so avoid working in a cold garage in winter without heating the space first.
Step 1 — Disassemble the Loose Joints
If old hide glue is holding the joint, apply gentle heat with a heat gun on the lowest setting or press a damp cloth against the joint for several minutes. The moisture softens the hide glue and lets the joint release cleanly. Use a rubber mallet and a block of scrap wood to tap joints apart — never use a metal hammer directly on the chair. Work methodically, freeing one joint at a time and keeping the disassembled pieces organized on a labeled cloth.
If the joint is held by dried PVA (white or yellow glue), it is harder to reverse. Soak a rag in warm water, wrap it tightly around the joint for 20–30 minutes, then try tapping it free. In stubborn cases, a thin chisel or stiff palette knife inserted at the glue line can help break the bond without forcing the wood.
Step 2 — Clean the Joint Surfaces
This is the step most people skip — and it is the most important one. New glue cannot bond to old glue. Use a sharp chisel, dental pick, or wire brush to remove every trace of old adhesive from the tenon and the inside of the mortise. Work patiently; a clean grey or tan wood surface should be visible when you are done. Finish by lightly sanding both surfaces with 120-grit sandpaper to raise the wood grain slightly, which improves glue penetration.
Do not sand the joint surfaces with anything coarser than 120-grit, and do not over-sand. Removing too much material from a tenon makes the fit even looser. You are abrading to clean and open the wood grain — not to resize the joint. If the tenon is already loose, you will address that in the next step.
Step 3 — Rebuild Loose or Worn Tenons
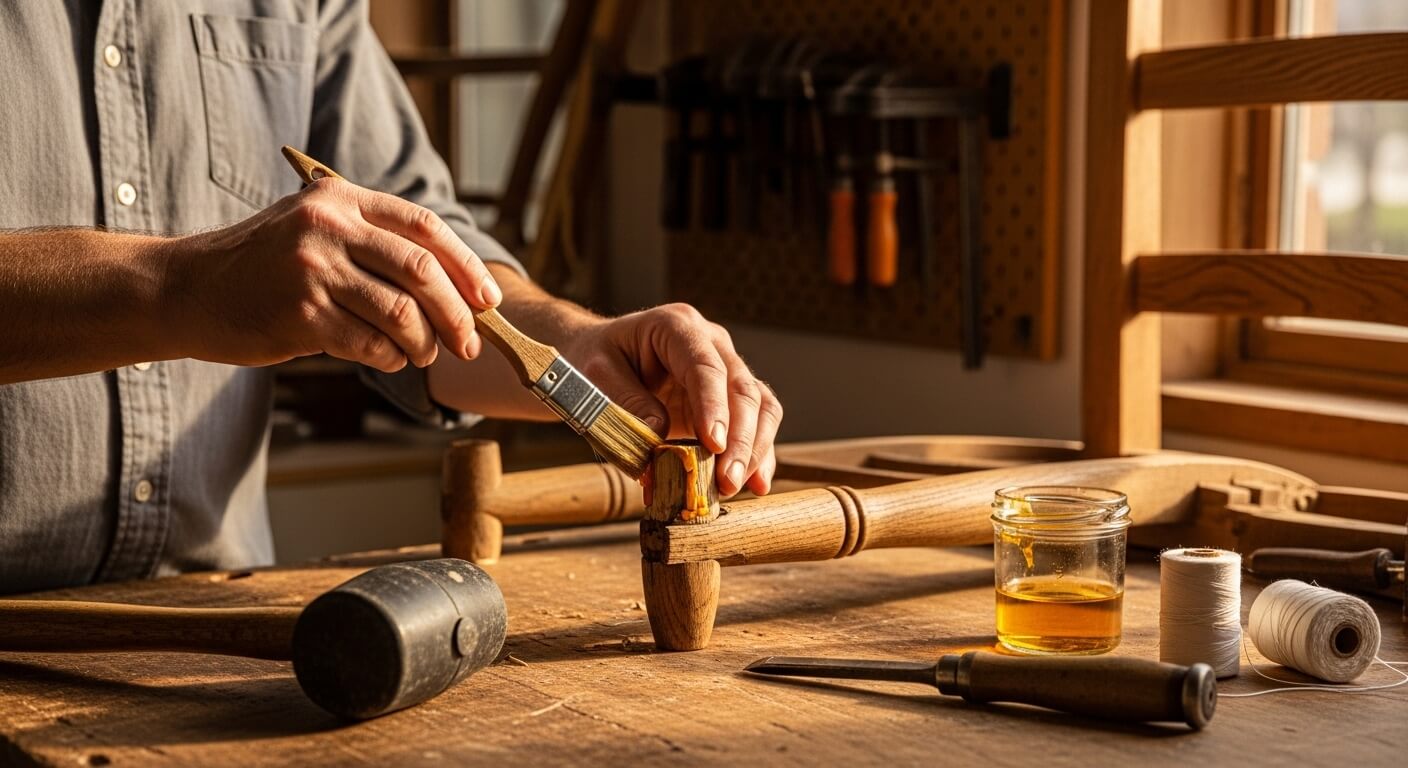
If the tenon slides loosely into the mortise with noticeable play, the wood has shrunk and you need to build it back up. For minor looseness, wrap the tenon tightly with two or three turns of thin cotton thread, then coat the thread in wood glue before inserting. The thread fills the gap and provides a fibrous surface for the adhesive to bond to. For more significantly worn tenons, glue a thin sliver of matching wood — cut from a piece of veneer or a wood shim — to the flat face of the tenon, let it cure overnight, then carefully pare it flush with a chisel before test-fitting the joint.
Step 4 — Apply Glue and Reassemble
Apply glue to both the tenon and the walls of the mortise using a small brush or a toothpick for tight spaces. You want a thin, even coat — not a thick blob. Insert the joint and rotate or rock the pieces slightly to distribute the adhesive. Then seat the joint fully by tapping with the rubber mallet and block. Work quickly if using hide glue, which has an open time of only 3–5 minutes in warm air.
Step 5 — Clamp and Allow Full Cure
Fit the band clamp around the full chair and tighten gradually and evenly. Use bar clamps on any individual joints that need extra pressure. Place wax paper under all glue squeeze-out to prevent the chair from sticking to the work surface. Check that the chair sits level on all four legs before the glue sets — slide it onto a flat surface and press down to confirm. Allow the glue to cure for the full time specified by the manufacturer: typically 24 hours for PVA and 48 hours for hide glue before placing any weight on the chair.
The chair joint repair process has one non-negotiable rule: never skip the surface preparation. A joint glued over old adhesive will fail within months. A joint glued to clean, bare wood, properly fitted and clamped, can last another century. Take the time to clean thoroughly and the rest of the process almost takes care of itself. This principle applies whether you are working on a Windsor side chair or a Victorian dining chair with complex carved details.
Choosing the Right Glue for Antique Chair Joints
The adhesive you choose has a significant impact on both the strength and the future repairability of the joint. For antique chair repair, three options dominate the field.
Hide Glue (Recommended for Antiques)
Hide glue — made from animal collagen — was the standard furniture adhesive for centuries and remains the gold standard for antique restoration. It is fully reversible with moisture and heat, which means future repairs are always possible. It creeps slightly under sustained load, allowing joints to self-adjust rather than crack. And because most antique chairs were originally assembled with hide glue, new hide glue bonds exceptionally well to the traces remaining in the wood pores. It is available as pre-mixed liquid (liquid hide glue from specialty woodworking suppliers) or as dried granules that you dissolve in warm water.
PVA Glue (Titebond I or II)
Standard yellow or white PVA wood glue is widely available, inexpensive, and produces a very strong bond. The downside for antique work is that it is far harder to reverse than hide glue. If you ever need to re-repair the joint, you will struggle to separate the pieces without risking damage. For chairs that are structurally stable but have only one or two loose joints, PVA is a practical choice. For pieces with multiple failing joints that may need re-repair in the future, hide glue is the better call.
Two-Part Epoxy
Epoxy is appropriate in limited circumstances — for example, when a tenon is so severely degraded that it needs a structural gap-filling adhesive rather than a film-forming one. According to USDA Forest Products Laboratory research, two-part epoxy systems create the strongest wood joints in terms of shear strength, but they are completely irreversible and can be difficult to apply in tight spaces. Reserve epoxy for emergencies and structural emergencies only on antique pieces.
Common Mistakes to Avoid
Gluing Without Disassembling
Squirting glue into a joint from the outside without disassembling it almost never works. The glue cannot reach the actual glue surfaces, and the squeeze-out you see on the exterior is usually the only adhesive that bonded to anything at all. It looks fixed for a few days and then fails entirely. Always disassemble for a lasting repair.
Using the Wrong Clamp Setup
Clamping a chair with four individual clamps applied diagonally will almost always pull the chair out of square. One leg ends up shorter, the chair rocks, and the glue cures with built-in stress that weakens the repair. A band clamp distributes tension evenly and is the correct tool for the job. If you do not have one, a long piece of heavy rope twisted tight with a stick (a tourniquet clamp) is a workable substitute.
Rushing the Cure Time
Wood glue labeled “30-minute clamp time” means 30 minutes before removing the clamps — not 30 minutes before use. Full strength for most PVA glues requires 24 hours; for hide glue, 48 hours. Sitting in a freshly glued chair before it has fully cured is one of the fastest ways to undo your work.
Ignoring the Finish Around the Joint
Wood glue does not bond to wax, varnish, or oil finishes. If the joint area has a heavy surface coating, carefully remove it from the immediate glue area with a small amount of acetone or fine sandpaper before applying adhesive. This is especially relevant for chairs that have been refinished multiple times and have built-up layers of topcoat at the joint lines.
Longevity and Maintenance After Repair
A well-executed antique fix holds for a very long time when the chair is maintained thoughtfully. The single most important factor is indoor humidity. Wood expands in damp conditions and contracts when the air is dry, and it is the cycling between these states — not age alone — that eventually loosens joints. Investing in a room humidifier for the winter months, when central heating drives indoor relative humidity below 30%, can add years of life to every piece of antique furniture in your home.
Clean your repaired chairs regularly with a barely damp cloth followed immediately by a dry one. Avoid silicone-based spray polishes, which build up a slippery film over time and can penetrate joints. A good paste wax applied once or twice a year protects the wood surface without compromising the joints. Check for early loosening annually by applying gentle lateral pressure to each joint — catching a joint just as it begins to move is far easier than waiting until it has fully separated.
For guidance on broader care, the Metropolitan Museum of Art’s furniture conservation department publishes excellent resources on long-term wooden furniture preservation. Their recommendations on environmental controls and cleaning products apply directly to antique chairs in home settings.
If you enjoy this kind of careful restoration work, you will find a wealth of project ideas, guides, and creative inspiration at CraftsnComforts.com — a space dedicated to making beautiful, handcrafted living accessible to everyone, regardless of experience level.
Frequently Asked Questions
What is the best glue to use for antique chair joint repair?
Hide glue is widely considered the best choice for antique chair joint repair. It was the original adhesive used in most antique furniture and bonds excellently to the residual glue already in the wood pores. It is also fully reversible with moisture and heat, which means future repairs are always possible without damaging the wood. Liquid hide glue from a woodworking supplier is the most convenient form for most home restorers.
Can I fix a wobbly chair without fully disassembling it?
In most cases, no. Squirting glue into a joint from the outside without disassembling it almost never works. The glue cannot reach the actual glue surfaces, and only the exterior squeeze-out bonds to anything. It may appear fixed for a few days but then fails entirely. A proper repair requires disassembling the loose joint, cleaning the surfaces thoroughly, and reassembling with fresh adhesive under proper clamping pressure.
How long should I wait before sitting in a repaired chair?
Allow the glue to cure for the full time specified by the manufacturer. Standard PVA wood glues typically require at least 24 hours of full cure time before placing weight on the chair. Hide glue benefits from 48 hours of undisturbed curing before use. The 30-minute clamp time listed on many glue products refers only to clamp removal — not readiness for use. Rushing the cure time is one of the most common reasons repairs fail.
My chair’s tenon is very worn and loose — how do I fix it?
For a worn or shrunken tenon, you need to build it back up before regluing. For minor looseness, wrap the tenon tightly with two or three turns of thin cotton thread, then coat the thread in wood glue before inserting. The thread fills the gap and provides additional bonding surface. For more significantly worn tenons, glue a thin sliver of matching wood to the flat face of the tenon, let it cure overnight, then carefully pare it flush with a chisel before test-fitting and final assembly.
How can I tell if my antique chair was made with hide glue?
Most antique furniture made before roughly 1950 was assembled with hide glue. A reliable test is to apply a damp cloth to an inconspicuous joint area and hold it for several minutes. If the joint softens or begins to move slightly, hide glue is almost certainly present — since PVA and modern adhesives are not water-reversible. The presence of yellowish or amber-colored flakes of dried adhesive at a joint line is also characteristic of aged hide glue.
What causes chair joints to loosen over time?
The most common cause is seasonal wood movement driven by fluctuating indoor humidity. Wood expands in damp conditions and contracts when the air is dry, and the repeated cycling between these states gradually works joints loose even when the original glue is still present. Chairs in centrally heated homes, which experience very dry winters, are especially vulnerable. Keeping indoor relative humidity between 45–55% year-round significantly slows joint loosening. Mechanical stress from normal use, particularly leaning back in a chair, contributes as well.
Do I need professional help to repair an antique chair, or can I DIY it?
The vast majority of loose chair joint repairs are within the reach of a patient, careful DIYer. The process requires no special woodworking machinery — just a rubber mallet, band clamp, good glue, and thorough surface preparation. Professional conservators are worth consulting when the piece has significant monetary or sentimental value, when joints are broken (not just loose), when carved or inlaid decorative elements are involved, or when the chair requires structural components to be fabricated from scratch.
Is it safe to use epoxy on antique furniture?
Epoxy can be used on antique furniture in specific circumstances — primarily when a tenon is so severely degraded that a gap-filling structural adhesive is needed. However, epoxy is completely irreversible, which means future repairs become extremely difficult without risking damage to the wood. For most antique chair joint repairs, hide glue is the preferred choice because it preserves the repairability of the piece. Reserve epoxy for genuine structural emergencies where no other adhesive will bridge the gap adequately.
Conclusion
A wobbly antique chair is not a hopeless case — it is an invitation to connect with the craftsmanship of the past. The techniques covered in this guide, from careful diagnosis through disassembly, surface preparation, tenon rebuilding, and proper clamping, give you everything you need to carry out a repair that will genuinely last. The chair joint repair process rewards patience far more than it rewards speed, and every minute spent cleaning old glue from a joint is a minute that keeps you from having to do this again next year.
Whether you are working on a Windsor farmhouse chair, a Chippendale side chair, or a Victorian balloon-back dining set, the underlying principles are the same. Wood shrinks, glue ages, and joints loosen — but with the right adhesive, proper preparation, and a band clamp doing its job overnight, you can restore structural integrity that rivals the original workshop assembly. The antique fix that seemed daunting at the start becomes genuinely satisfying the moment you sit in that chair and feel it hold solid and steady beneath you.
Keep your workshop stocked with a bottle of hide glue and a good band clamp, maintain consistent indoor humidity, and give your antique chairs the same seasonal attention you would give any other valued possession. They were built to last — and with thoughtful care, they absolutely will.