
DIY Shoe Rack for Small Space: Step-by-Step Guide to a Clutter-Free Entryway
9 min read
Building a DIY shoe rack for small space is one of the most satisfying weekend projects you can take on — especially when your entryway looks like a shoe avalanche waiting to happen. If you’ve been tiptoeing around a pile of sneakers, sandals, and boots every morning, you already know how quickly footwear can swallow an entire hallway. The good news? You don’t need a sprawling mudroom or a generous renovation budget to fix this. A well-planned, custom-built shoe rack can reclaim your floor space and bring genuine order to even the tightest corners.
What I love about building your own shoe storage — rather than buying a generic shelf from a big-box store — is that you get to design exactly around your constraints. A 12-inch-deep entryway nook, an awkward closet corner, a wall behind a door that’s otherwise wasted — all of these become real storage opportunities the moment you pick up a saw and some wood. In my experience, a small space shoe rack built to fit your specific dimensions will hold more pairs, look cleaner, and stay sturdier than anything mass-produced at the same price point.
This guide walks you through every stage: choosing the right design for your layout, gathering materials without overspending, cutting and assembling your rack, and finishing it so it actually looks like a piece of furniture and not a school project. Whether you’re a first-time builder or someone who’s made a few IKEA hacks in your day, the steps here are written to be clear, specific, and genuinely useful. Let’s turn that shoe chaos into something you’re proud to walk past every morning.
Why a DIY Shoe Rack Is the Smartest Small Space Solution
Walk into any home goods store and you’ll find shoe racks in two flavors: flimsy wire shelves that tip at the slightest nudge, or bulky wooden units designed for walk-in closets. Neither one was built with a 30-inch entryway in mind. That’s the core problem with off-the-shelf storage — it’s designed for hypothetical average spaces, not yours.
A custom-built shoe rack small space solution solves this in ways a store-bought item simply cannot. You control the depth (critical in narrow hallways), the height (important if you’re maximizing vertical space below a coat hook), and the number of tiers (because your household might have 8 pairs or 28). You also control the finish, which means your rack can match your existing trim, floor color, or furniture style rather than clashing with everything around it.
Beyond the fit, there’s a real cost argument here. A quality wooden shoe shelf at retail can run $80–$200. Building a comparable unit yourself — with better wood and custom dimensions — typically costs $25–$60 in materials. That savings is real money, and it’s paired with something a store purchase can never give you: the satisfaction of having built it yourself. If you’re already thinking about broader home organization wins, pairing your new shoe rack with thoughtfully organized storage bins nearby can make your entryway feel genuinely transformed.
📌 Key Takeaway
Custom dimensions are the single biggest advantage of a DIY build. Even a 2-inch difference in depth or height can mean fitting 4 more pairs of shoes — a meaningful gain in any small space.
Small Space Shoe Rack Ideas: Choosing the Right Design
Before you buy a single board, spend five minutes with a measuring tape and think honestly about your space. The design that works best depends entirely on where the rack will live and how many shoes it needs to hold. Here are the most practical formats for tight spaces, all of which you can build with beginner-to-intermediate woodworking skills.
What is the best type of shoe rack for a narrow entryway?
For a narrow entryway — say, 10 to 18 inches of usable depth — an angled-tier rack is your best friend. By tilting the shelves at roughly 15 to 20 degrees, shoes sit heel-down at the back and toe up at the front, which actually reduces the depth footprint compared to laying shoes flat. A two-tier angled rack can hold 10–12 pairs of adult shoes in just 9 inches of floor depth. This design is the most popular small space shoe rack idea on Pinterest for good reason: it looks intentional and stores more than you’d expect. If your entryway is extremely narrow, consider a vertical wall-mounted version where boards attach directly to studs — this gets the entire unit off the floor, which also makes sweeping and mopping dramatically easier.
Can I build a shoe rack that doubles as a bench?
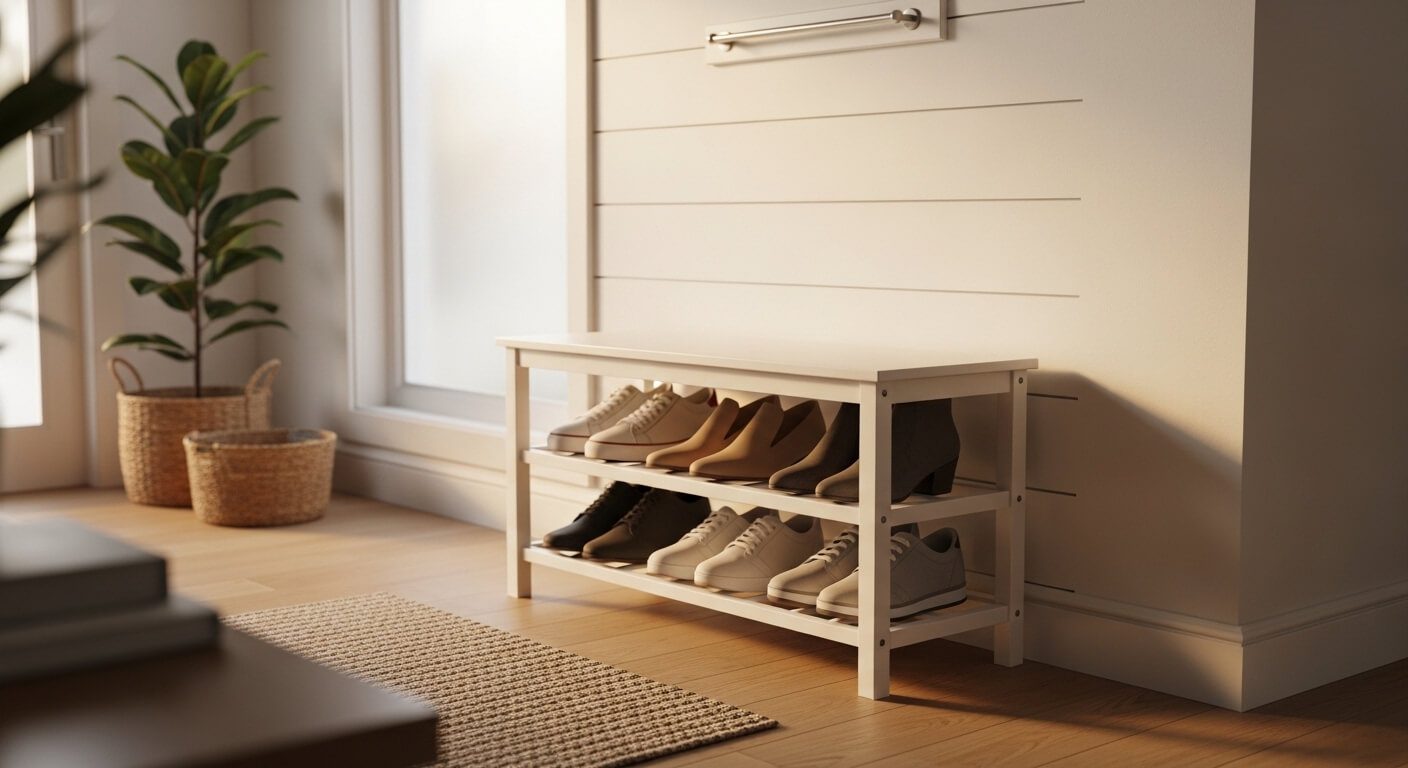
Absolutely — and honestly, this is my favorite design for small entryways. A bench-top shoe rack puts storage beneath a sitting surface, giving you a place to actually pull your shoes on without hopping around on one foot. The bench top can be a solid 3/4-inch plywood panel finished with a coat of polyurethane, or you can add a thin cushion secured with velcro for comfort. Structurally, the bench needs to support around 250–300 lbs safely, which a properly assembled 3/4-inch plywood box handles with ease. This design works especially well paired with wall hooks directly above — suddenly your entryway has a full mini mudroom station in 24 to 36 inches of wall space.
What about corner shoe racks for small rooms?
Corners are among the most underused spots in any home. A triangular or L-shaped corner shoe rack can hold 8–15 pairs in space that typically stores nothing but dust. The build is slightly more complex — you’ll cut boards at 45-degree angles to meet cleanly in the corner — but the payoff in terms of recovered floor space is significant. This design also pairs naturally with corner closet organization systems, and if you’re working on a full bedroom or closet refresh, linking your shoe storage to your closet organization ideas can create a genuinely cohesive system.
💡 Pro Tip
Before committing to any design, tape out the footprint on your floor with painter’s tape. Living with that “shadow” for a day tells you whether the size feels right before you’ve cut a single board.
Materials, Tools & Cost Breakdown
One of the nicest things about this project is that the materials list stays short. You don’t need exotic hardwoods or specialty hardware. The builds described in this guide use dimensional lumber and basic plywood — both available at any home improvement store, often with pre-cut services available if you don’t own a saw.
What wood should I use for a DIY shoe rack?
For most small-space shoe racks, 3/4-inch plywood (sanded) is the workhorse material. It’s flat, stable, holds screws well, and takes paint or stain beautifully. For visible edges, either use iron-on edge banding or rip thin strips of solid pine to glue on as edge trim. If you want a more furniture-like look without a lot of extra finishing work, 1×10 or 1×12 pine boards from the lumber aisle are pre-dimensioned and need only light sanding. Avoid particle board for shoe storage — moisture from wet shoes degrades it surprisingly fast, and it doesn’t hold screws under repeated load nearly as well as real wood. For a budget-conscious build, a combination of one sheet of 3/4-inch plywood for shelves and a few 2×2 furring strips for legs or frames keeps costs very low while maintaining solid structural integrity.
| Item | Budget Build | Mid-Range Build | Premium Build |
|---|---|---|---|
| Lumber / Plywood | $12–$18 | $25–$35 | $50–$80 |
| Screws & Hardware | $4–$6 | $8–$12 | $15–$22 |
| Sandpaper & Primer | $3–$5 | $6–$10 | $12–$18 |
| Paint or Stain | $0 (leftover) | $10–$15 | $20–$30 |
| Wall Anchors (if mounted) | $3–$5 | $5–$8 | $10–$15 |
| Total Estimated Cost | $22–$34 | $54–$80 | $107–$165 |
Tools needed are minimal: a circular saw or jigsaw (or ask the lumber yard to cut for you), a drill/driver, a speed square, clamps, and a measuring tape. Sandpaper in 80 and 120 grit, a small paintbrush or foam roller, and wood glue round out the kit. Total tool cost if you’re buying from scratch is around $60–$90, but most homeowners already have at least half of these on hand.
Step-by-Step: How to Build a Shoe Rack for Small Spaces
The following steps describe building a classic three-tier freestanding shoe rack — roughly 32 inches wide, 24 inches tall, and 11 inches deep — sized for a standard entryway and capable of holding 12–15 pairs of shoes. Adjust the measurements to fit your space. All cuts are straight, making this a genuinely beginner-friendly project.
Measure Your Space and Plan Your Cuts
Start with your measuring tape — not a guess. Measure the width of the wall or nook where the rack will live, the available height (factor in clearance from any door swing), and the depth of floor space you can realistically use. For a standard entryway, I recommend no more than 12 inches deep so the rack doesn’t create a trip hazard. Write down your cut list: two side panels, three shelves, and (optionally) a back panel if you want the rack to also function as a room divider. Create a simple sketch with all dimensions labeled. According to Wood Magazine, measuring twice and cutting once isn’t just a cliché — it’s the single most effective way beginners avoid wasted material.
Cut Your Wood Panels
Using your cut list, cut the side panels and shelves from your 3/4-inch plywood. Side panels for this build are 24 inches tall by 11 inches deep. Shelves are 32 inches wide by 11 inches deep (three of them). If you’re using a circular saw, clamp a straight board to your plywood as a cutting guide — this gives you factory-straight cuts without a table saw. After cutting, lightly sand all edges with 80-grit sandpaper to remove splinters, then follow with 120-grit for a smoother feel. This step takes about 30–45 minutes if your cuts are planned and your lumber is pre-marked.
Mark Shelf Positions on Side Panels
Lay both side panels flat, stack them together, and use a pencil and speed square to mark identical shelf positions on both simultaneously. Bottom shelf: 0–3/4 inch from the base (sitting directly on the floor or on small furniture feet). Middle shelf: 9 inches from the bottom. Top shelf: 18 inches from the bottom. This spacing accommodates most adult footwear — you get roughly 8.25 inches of clearance per tier, which fits sneakers, dress shoes, and most boots lying flat. If you have taller boots, simply increase the spacing to 10–12 inches on the upper tiers.
Pre-Drill Holes and Assemble the Frame
Pre-drilling is the step most beginners skip — don’t. Without pilot holes, driving screws into plywood edges will split the wood. Use a drill bit slightly smaller than your screw diameter, drilling through the side panel into the shelf edge. Apply a thin bead of wood glue to each shelf end before screwing. Use two 1-5/8-inch screws per joint — one near the top edge of the shelf, one near the bottom. Clamps hold everything square while you drive screws. Assemble bottom shelf first, then middle, then top. Check for square at each stage using your speed square or by measuring corner-to-corner diagonals (they should be equal).
⚠️ Warning
Always check that your assembled rack is plumb (vertically level) before the glue fully sets. A rack that looks “close enough” during assembly can lean noticeably once it’s against a wall. A 2-foot level takes 10 seconds to confirm — use it.
Add Angled Shelf Strips (Optional but Recommended)
To convert flat shelves into angled tiers — which dramatically improves capacity and visual appeal — cut 1×2 pine strips and attach them along the front bottom edge of each shelf. These act as a lip, raising the front of each shelf by about 1.5 inches and creating a natural heel-down lean for shoes. Secure these strips with glue and a few 1-inch brad nails or finish nails. This simple addition transforms a basic flat-shelf rack into a proper angled shoe rack small space design that holds noticeably more pairs per tier.
Sand the Entire Unit Smooth
With the frame assembled and glue dried (give it at least 2 hours), do a full sand of the entire unit. Start with 80-grit to knock down any glue squeeze-out and rough spots, then finish with 120-grit for a surface that accepts paint or stain evenly. Pay special attention to corners and edges — rounded edges not only look more finished but also prevent fabric snags on shoe uppers. Vacuum away all dust and wipe down with a tack cloth or slightly damp rag before moving to finishing.
🔎 Did You Know
According to the U.S. Federal Emergency Management Agency, cluttered entryways and hallways are among the most common contributors to household trip-and-fall injuries. Organized shoe storage isn’t just aesthetic — it’s genuinely safer.
Finishing, Painting & Styling Your Shoe Rack for Small Spaces
Finishing is where your rack stops looking like a woodworking project and starts looking like furniture. This stage takes the same amount of time as the build itself — maybe longer — and it’s absolutely worth the patience. Rushing the finish is the number one reason DIY furniture looks DIY.
Start with a coat of wood primer on all surfaces. Primer accomplishes two things: it seals the wood grain so your topcoat goes on evenly, and it dramatically improves adhesion so the paint doesn’t chip or peel with regular use. Let the primer dry fully (at least 2 hours for most products), then lightly sand with 220-grit sandpaper to knock down any raised grain. This step, called “de-nibbing,” is what separates smooth professional-looking finishes from rough DIY-looking ones.
For the topcoat, a semi-gloss or satin interior paint in white, black, or a warm natural wood tone are the most versatile choices for entryways. Two thin coats always outperform one thick coat — thick paint sags, drips, and takes forever to dry. Use a foam roller for flat surfaces and a small brush for corners and edges. Allow 4 hours between coats. Once fully cured (48–72 hours), your rack is ready for shoes.
Want a more natural look? A clear or lightly tinted wood stain followed by two coats of polyurethane is a beautiful option that shows off the wood grain. This finish is also more water-resistant — a genuine advantage for shoes that come in wet from rain. If you’re also tackling your pantry or kitchen storage this season, many of the same finishing techniques apply to pantry organization shelving builds, so you can knock out multiple projects with one set of materials and skills.
💡 Pro Tip
Add small adhesive furniture felt pads to the bottom corners of your rack before placing it. They protect hardwood and tile floors from scratches, and they make the rack dramatically easier to slide out for sweeping underneath — a real quality-of-life upgrade that costs about $2.
Common Mistakes When Building a Shoe Rack for Small Space
I’ve built enough of these to know where things go wrong. Here are the most common errors — and how to sidestep each one cleanly.
- Building too wide for the space: Measure the floor space, then subtract at least 2 inches from each side for breathing room and easy removal. A rack wedged wall-to-wall is difficult to clean behind and impossible to reposition without scratching the floor.
- Making shelf spacing too shallow: 8 inches of clearance feels like enough until you try to store ankle boots or high-tops. Build for your largest shoe type, not your smallest.
- Using drywall screws instead of wood screws: Drywall screws are brittle and prone to snapping under lateral stress. Use proper coarse-thread wood screws — they cost the same and hold dramatically better.
- Skipping the pilot holes: Plywood edges will split without pre-drilling. Always pre-drill, always.
- Not sealing the bottom shelf: The bottom tier of a shoe rack gets the most moisture exposure from wet footwear. A coat of polyurethane on the bottom shelf specifically (even if you paint the rest) extends its life significantly.
- Overcomplicating the design for a first build: A simple rectangular box with three flat shelves, well-built and nicely finished, beats an elaborate design executed poorly. Start simple. Complexity comes with confidence.
One thing that often gets overlooked in small entryways is cords and cables — particularly if you have a phone charging station or a smart doorbell nearby. Managing those neatly as part of your entryway refresh is worth considering, and a solid approach to cable management can make the whole space look significantly more polished without additional furniture.
Longevity & Maintenance: Keeping Your Small Space Shoe Rack in Top Shape
A well-built wood shoe rack can last a decade or more with minimal care. The main enemies are moisture, overloading, and general neglect. Here’s how to stay ahead of each.
Moisture management: Wet shoes are a constant in rainy seasons. Place a small boot tray or silicone mat on the bottom shelf to catch drips. This single habit prevents the water staining and wood swelling that degrades unprotected wood over time. Allow wet shoes to fully dry before storing them on enclosed or tight-spaced shelving. If your entryway tends to be humid, a small can of shoe rack refresher or a silica gel packet tucked on the bottom shelf keeps things fresh without any effort.
Weight distribution: Most small shoe racks are built to hold 100–150 lbs total. Resist the temptation to pile heavy boots three deep on each shelf. Spread weight across tiers, and if your household is growing its footwear collection, build a second rack rather than overloading the first.
Annual refresh: Once a year, pull the rack out, vacuum behind and beneath it, and check all joints for any loosening. A drop of wood glue and a re-tightened screw at a wobbly joint costs 10 minutes and prevents a collapse. Touch up any paint chips or scuffs with a small brush — this keeps the rack looking intentional rather than worn.
If you find your shoe storage expanding beyond what a single rack can handle — a common progression once your family realizes how much better life is with organized footwear — consider extending your storage thinking vertically with under bed storage solutions for off-season shoes and boots. This kind of layered storage approach is exactly how small-space living works at its best: every zone in the home carries a specific organizational role.
Frequently Asked Questions
How much does it cost to build a DIY shoe rack for a small space?
The cost to build a diy shoe rack for small space ranges from about $22 to $165 depending on materials and finish level. A budget build using basic plywood and leftover paint typically comes in under $35. A mid-range build with pine boards and fresh paint runs $54–$80. A premium build using hardwood or poplar with stain and polyurethane can reach $100–$165. In all cases, this is significantly cheaper than comparable store-bought units, and your rack will be custom-sized for your exact space. Hardware — screws, wall anchors, furniture feet — adds $5–$20 depending on your chosen design. Budget builds are entirely capable of producing sturdy, attractive results.
What is the best wood for a DIY shoe rack in a small entryway?
3/4-inch plywood (sanded grade) is the best all-around material for a shoe rack small space project. It’s dimensionally stable, holds screws well, takes paint and stain evenly, and resists warping better than solid pine in humid entryway conditions. For a more furniture-like appearance, 1×10 or 1×12 clear pine boards are excellent — they’re pre-dimensioned, easy to work with, and look beautiful stained. Avoid particle board and MDF for shoe racks specifically: moisture from wet shoes degrades these materials much faster than real wood, causing swelling and delamination within 1–2 seasons of regular use. Poplar is a great premium choice if you plan to paint — it’s harder than pine and resists dents well.
How many pairs of shoes can a small space shoe rack hold?
A standard three-tier shoe rack built at 32 inches wide typically holds 12–15 pairs of adult shoes when shelves are flat, and up to 18–20 pairs when shelves are angled (heel-down). The angled design is the most efficient small space shoe rack idea because it reduces the floor depth needed per pair from about 12 inches to roughly 7–8 inches. Narrower racks (24 inches wide) hold 9–12 pairs per three tiers. If you need maximum capacity in minimum space, a vertical wall-mounted design with 5–6 angled tiers can hold 25+ pairs in the footprint of a standard rack — though it requires secure wall anchoring into studs for safety.
Can I build a wall-mounted shoe rack without studs?
You can mount a lightweight shoe rack without hitting studs, but only with appropriate hollow-wall anchors rated for the expected load. Toggle bolt anchors (also called butterfly anchors) can support 50–100 lbs in drywall — enough for a small, lightly loaded rack. However, for any rack expected to hold more than 30–40 lbs of footwear (which is actually quite easy to reach with 10+ pairs), mounting into studs is strongly recommended. Use a stud finder — they’re inexpensive and available at any hardware store. If stud positions don’t align with your desired rack width, a horizontal mounting rail attached to two studs and then your rack attached to that rail is the professional solution. Never mount heavy storage to drywall alone using only basic wall anchors.
How do I stop my shoe rack from wobbling on uneven floors?
Wobbling on uneven floors is one of the most common frustrations with freestanding shoe racks — DIY or store-bought. The cleanest solution is adjustable furniture leveling feet, which screw into the bottom of the rack frame and can be turned up or down to compensate for floor irregularities. These cost $6–$12 for a set of four at any hardware store. Alternatively, adhesive felt pads of varying thicknesses can be shimmed under the low corners until the rack sits level. If the wobble is severe (more than 3/4 inch), consider securing the rack to the wall with a small L-bracket at the top — this eliminates all movement while still allowing easy removal for cleaning. According to Family Handyman, this wall-tipping approach is the same principle used to secure bookshelves for earthquake safety.
What is the ideal depth for a shoe rack in a small hallway?
For a standard hallway or entryway, a shoe rack depth of 10 to 12 inches is the sweet spot for a shoe rack for small space use. This accommodates most adult shoe sizes (up to US Men’s 13) laid flat, while leaving a walkable corridor. For angled-tier designs, you can reduce depth to 8–9 inches because the heel-up position shortens each shoe’s floor footprint. If your hallway is extremely tight — say, under 36 inches total width — a wall-mounted design with angled wire or wood rungs is the most depth-efficient option, often projecting only 5–6 inches from the wall. Always prioritize walkway safety: a minimum 28-inch clear walking path is the standard recommended by home safety guidelines, so design your rack dimensions accordingly.
How long does it take to build a DIY shoe rack for a small space?
A straightforward three-tier freestanding shoe rack takes approximately 3–5 hours from first cut to final assembly — not including drying time for glue, primer, and paint. If you’re new to woodworking, budget an extra hour for measuring, re-measuring, and getting comfortable with each step. Finishing (priming, painting, curing) adds another day of elapsed time, though actual hands-on work is only 45–60 minutes spread across two coats. If you’re having lumber cut at the store, that eliminates sawing time and can reduce the build phase to under 2 hours. All in, this is a highly achievable weekend project — start Saturday morning and have a finished, painted rack ready by Sunday evening.
Can I use PVC pipes instead of wood for a shoe rack?
PVC pipe shoe racks are a legitimate and increasingly popular small space shoe rack idea — particularly for garages, laundry rooms, and budget-first builds. Two parallel horizontal PVC pipes per tier (typically 3/4-inch or 1-inch diameter) serve as the rungs that shoes rest on heel-and-toe, and vertical pipes or wood uprights create the frame. PVC is waterproof, lightweight, easy to cut with a simple hacksaw, and costs very little. The main trade-off is aesthetics: PVC racks look utilitarian rather than furniture-grade, which is fine for utility spaces but may feel out of place in a styled entryway. For a hybrid approach, a wood frame with PVC rungs combines durability with a more finished look at a very low material cost.
Conclusion: Your Small Space Deserves Smarter Storage
A DIY shoe rack for small space situations is genuinely one of the highest-impact home organization projects you can do in a single weekend. The math is simple: minimal materials, a few hours of focused work, and you recover usable floor space while eliminating one of the most persistent sources of daily household frustration. More than that, a well-built, nicely finished shoe rack signals to everyone who walks in your door that your home is intentionally organized — and that feeling spreads.
The design you choose matters less than the execution. A simple flat-shelf rack built with care and finished properly will outperform an ambitious angled corner unit rushed through construction. Start with a design that matches your current skill level, complete it thoroughly, and let that success build confidence for the next project. Once your entryway is sorted, you’ll likely find yourself eyeing other organizational opportunities throughout your home — bedroom closets, pantry shelving, and the inevitable cable tangle near your entertainment center all respond brilliantly to the same focused, custom-build approach.
If you’re ready to keep the momentum going, consider how your new shoe storage can be part of a broader home organization strategy. Topics like closet organization ideas, thoughtful pantry organization systems, and smart under-bed storage for seasonal items all extend the same principle: when storage is built around your actual space and habits, it works — and it keeps working. Start with those shoes. The rest follows naturally.