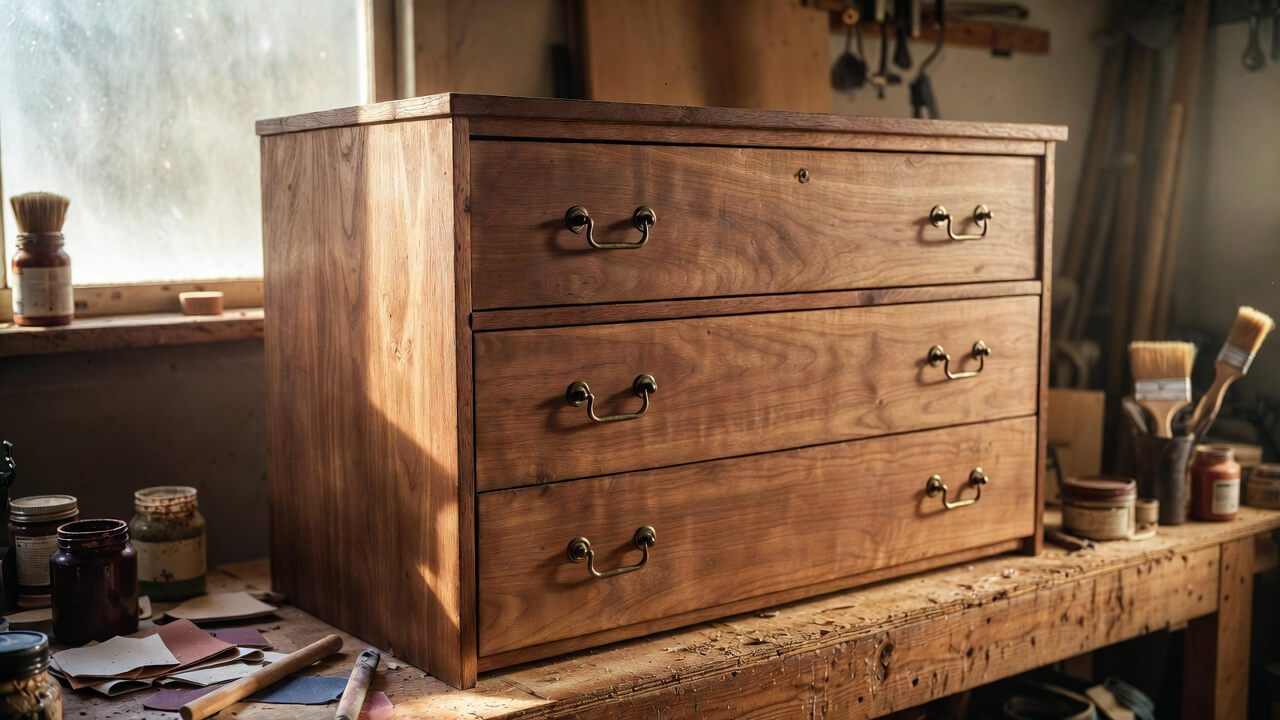

Why 1970s Solid Wood Dressers Are Worth Restoring
Walk into almost any thrift shop, estate sale, or Facebook Marketplace listing and you will find them stacked in corners, draped in dust, and priced almost like trash. Those chunky, heavy, slightly yellowed dressers from the 1970s. Many people scroll past them. Smart DIYers stop and load them into the car.
Here is what most people do not realize: furniture built in the 1960s and 1970s was often constructed from genuine solid hardwood or high-quality wood veneers over solid wood cores. The joinery was tight. The drawers were deep. The bones were built to last generations. Compare that to the particle board flatpack furniture dominating today’s market, and the difference becomes obvious almost immediately.
A 70s furniture makeover is not just a hobby project. It is an investment. Restored vintage dressers regularly sell on Etsy, Chairish, and at local antique markets for three to eight times their thrift store price. If you are interested in the furniture flipping world, these pieces represent some of the highest return-on-investment finds available today.
This step-by-step guide walks you through everything, from evaluating a piece worth buying to applying the final protective coat that will keep your work looking beautiful for years. Whether you are restoring for your own bedroom or building a side business, the process here is thorough, practical, and tested on real pieces.
Quick Summary: What This Restoration Covers
- How to evaluate and source a quality 1970s solid wood dresser
- Full cleaning and prep process before any sanding begins
- Step-by-step sanding vintage wood technique for a flawless surface
- Choosing between stain, paint, and natural oil finishes
- How to update hardware for a modern or vintage-authentic look
- Reassembly tips and final protective finishing
- Cost breakdown across budget, mid-range, and premium approaches
- Common mistakes that ruin restorations and how to avoid them
- Maintenance advice to keep your dresser looking great for decades
Step 1: Finding and Evaluating the Right Piece
What to Look For at Thrift Stores and Estate Sales
Not every old dresser deserves a restoration. The first skill to develop is knowing which pieces have real potential and which are more trouble than they are worth. Start by tapping the sides and top with your knuckles. Solid wood produces a dense, dull thud. Hollow particleboard or MDF makes a lighter, papery knock. This single test eliminates most pieces before you ever lift a drawer.
Next, pull out the drawers completely and examine the joinery. Dovetail joints, those interlocking wedge-shaped cuts you see at the corners of drawers, are a hallmark of quality craftsmanship. You will find them frequently on furniture made before the mid-1980s. They indicate a piece built to be repaired and restored, not thrown away.
Check the frame for serious structural damage. Wobble the case side to side. A small amount of looseness in the joints is normal and fixable with wood glue. Large splits, warped panels, or major water damage that has delaminated a veneer surface are more challenging. For your first few projects, stick to pieces that need cosmetic work more than structural surgery.
Old House Journal is an excellent resource for understanding construction methods used in vintage American-made furniture from this era. Familiarizing yourself with regional styles and makers from the 1970s helps you recognize pieces worth pursuing quickly.
Where to Source 1970s Dressers
- Facebook Marketplace: search using terms like ‘solid wood dresser’ or ‘vintage bureau’
- Goodwill and Salvation Army: large-format furniture donations often arrive on Mondays and Thursdays
- Estate sales: typically priced to clear, not to profit, making them ideal for finding quality pieces cheaply
- Craigslist free section: many sellers simply want pieces removed and will offer them at no cost
- Garage sales in older neighborhoods: houses built in the 1960s and 1970s often still hold their original furniture
Step 2: Cleaning and Disassembly
Deep Cleaning Before You Touch Sandpaper
Before any sanding happens, every surface of the dresser needs a thorough cleaning. This step is consistently skipped by beginners and consistently regretted. Old wax, grime, grease, and decades of built-up product residue will clog your sandpaper instantly and create an uneven surface that haunts the final finish.
Mix a solution of warm water and a few drops of dish soap. Use a soft cloth or sponge to wipe down every surface, including the interior of drawers and the back panel. For stubborn wax buildup, mineral spirits applied with a fine steel wool pad (0000 grade) will cut through old furniture polish effectively. Wipe with the grain direction, never against it.
Allow the piece to dry completely for at least 24 hours in a well-ventilated space. Rushing this stage introduces moisture into the wood, which can raise the grain and create bubbling under your final finish. Patience here saves hours of rework later.
Removing Hardware and Drawer Slides
Remove all hardware before cleaning and certainly before sanding. Attempting to sand around knobs and pulls is a shortcut that produces visibly uneven results. Place all screws, bolts, and existing hardware into a labeled zip-lock bag. You will decide later whether to reuse, clean, or replace the furniture hardware entirely.
Inspect the drawer slides. Many 1970s dressers used wooden runners rather than metal tracks. These often just need a light sanding and a coat of paste wax to glide smoothly again. Cracked or broken wooden runners can typically be replaced for under five dollars at any hardware store.
Step 3: Sanding Vintage Wood the Right Way
Grit Progression: The Foundation of a Flawless Surface
Sanding vintage wood is a discipline, not just a step. The goal is to remove the old finish evenly while preserving the wood’s natural character and minimizing how much material you take off. Starting with too coarse a grit tears into the surface unnecessarily. Starting too fine means your first pass barely touches the old finish.
For most 1970s dressers with a heavy lacquer or polyurethane coating, begin with 80-grit sandpaper if the finish is thick and heavily deteriorated. If the existing finish is thin or already flaking significantly, 100-grit is often a better starting point. Always sand in the direction of the wood grain. Moving across the grain creates scratches that become visible under stain.
Progress through the grits: 80 or 100 to 120, then 150, then 180, and finish with 220-grit for a smooth, paint-ready surface. If you plan to stain rather than paint, a final pass with 220-grit is essential. Stain absorbs unevenly into scratches from coarser grits and creates blotchy results that are difficult to correct.
Wood Finishing Experts at This Old House , finishing with 220-grit before applying any stain or sealer is one of the most impactful things a DIYer can do to achieve professional-looking results on natural wood surfaces.
Tools for Sanding
- Random orbital sander: best for large flat surfaces, minimizes swirl marks
- Detail sander or sanding block: essential for edges, corners, and carved details
- Hand-folded sandpaper: for inside drawer tracks, tight joints, and curved profiles
- Tack cloth: wipe surfaces between grit changes to remove all dust before proceeding
- Shop vacuum with fine dust attachment: keeps your workspace clear and protects your lungs
Step 4: Choosing Your Finish
Stain vs. Paint vs. Natural Oil
This is the decision that shapes the character of the finished piece. Each approach has genuine advantages depending on the wood species, the condition of the surface, and the aesthetic you are going for.
Staining highlights the natural grain and warm tones of hardwood. It works beautifully on oak, walnut, cherry, and teak, all common in 1970s American and Scandinavian-influenced furniture. A medium walnut or early American stain transforms yellowed, dull wood into something that looks genuinely warm and intentional. Apply stain with a foam brush or lint-free rag, let it penetrate for two to five minutes depending on the depth of color you want, and wipe off the excess cleanly.
Painting is the smarter choice when the wood surface has significant blotching, deep repairs, or mismatched patches from previous damage. Chalk paint has become enormously popular in the furniture flipping tutorial community because it adheres well to previously finished surfaces with minimal prep and creates a matte, period-appropriate texture. Colors like sage green, navy, and warm cream are perennially strong sellers when flipping for resale.
Natural oil finishes, such as Danish oil or tung oil, are the most hands-off approach and produce the most organic, low-sheen result. They are particularly effective on pieces with genuinely beautiful grain that benefits from a transparent treatment. The downside is that oils offer less protection against moisture and daily wear than a topcoat of polyurethane.
Applying a Protective Topcoat
Regardless of whether you stain or paint, a protective topcoat is almost always necessary. For stained pieces, a water-based polyurethane in matte or satin sheen provides durable protection without the yellowing that oil-based poly can introduce over time. Apply two to three thin coats, sanding lightly with 320-grit between coats and wiping with a tack cloth before each application.
For painted pieces, a finishing wax or polycrylic topcoat protects the paint layer without adding significant sheen. Wax is easier to apply and creates a beautiful hand-rubbed quality, but requires occasional reapplication. Polycrylic is more durable and suitable for high-use pieces like dressers in children’s rooms.
Tools and Materials You Will Need
- Random orbital sander and sandpaper in 80, 100, 120, 150, 180, and 220 grits
- Detail sander or assorted sanding blocks
- Mineral spirits and 0000 steel wool for pre-cleaning
- Tack cloths (buy a multipack; you will use several)
- Wood stain, chalk paint, or Danish oil in your chosen color
- Water-based polyurethane, polycrylic, or finishing wax for topcoat
- Foam brushes and lint-free rags for stain application
- Paintbrushes (synthetic bristle for water-based products)
- Wood filler or wood putty in a matching tone for repairs
- Replacement furniture hardware or cleaning supplies for existing hardware
- Screwdrivers, including Phillips and flathead
- Painter’s tape for protecting edges during painting
- Drop cloth and adequate ventilation in your workspace
Cost Breakdown: Budget, Mid-Range, and Premium
Budget Approach (Under $40 in Materials)
This assumes you already own a sander or are willing to sand by hand. Pick up a quart of chalk paint from a craft store, a small container of finishing wax, and a multipack of sandpaper. Supplement with mineral spirits and a tack cloth. The dresser itself, sourced from a thrift store or Marketplace, might cost between $10 and $30. Total investment for a finished piece: $40 to $70.
Mid-Range Approach ($60 to $120 in Materials)
A quality random orbital sander runs $35 to $60 at most hardware stores and is worth every cent for the time it saves. Add a quart of wood stain, a can of water-based polyurethane, foam brushes, and quality sandpaper. This range also covers better wood filler for repairs and a set of replacement drawer pulls from a hardware store or online retailer. Total project cost: $80 to $150 with dresser.
Premium Approach ($150+ in Materials)
Premium projects use higher-end stains such as Rubio Monocoat or Osmo Polyx, which deliver exceptional depth and durability in a single application. You might also invest in a paint sprayer for a flawless finish on painted pieces, replace the furniture hardware with solid brass or ceramic custom pulls, and use a cabinet-grade polyurethane for the topcoat. These investments dramatically increase the finished value of the piece, particularly important if you are restoring to resell.
Restoring vs. Replacing: Is It Worth It?
A solid hardwood dresser from the 1970s, fully restored, will outlast almost any new bedroom furniture available at mid-range price points today. The comparison is not flattering to modern furniture. Particle board swells when exposed to humidity. Drawer tracks fail. Laminate peels. With a vintage piece, even if you need to re-glue a joint or replace a runner in ten years, the repair is straightforward.
From a cost perspective, a $25 thrift store find with $80 in materials becomes a dresser that would cost $400 to $600 if purchased new at comparable quality. In the resale market, a beautifully executed 70s furniture makeover often commands $300 to $600 on platforms like Chairish, Craigslist, or local antique markets.
The CraftsnComforts.com community has covered this comparison extensively in guides on furniture flipping economics, and the numbers consistently favor restoration when the source piece has genuine solid wood construction.
Updating the Hardware
To Keep, Clean, or Replace
Hardware decisions make an enormous visual impact on the finished piece. Original 1970s furniture hardware, often in brushed gold or chrome, can be cleaned and polished to serve as a period-authentic detail that collectors love. Soak original pulls in a mixture of white vinegar and water for 20 minutes, scrub with an old toothbrush, dry thoroughly, and apply a coat of metal polish.
If you want a modern feel, replacing the furniture hardware entirely is the fastest way to update a piece without changing its finish. Matte black hardware transforms a natural-stained oak dresser into something that reads as contemporary design. Ceramic knobs in white or terracotta create a farmhouse or eclectic aesthetic. Unlacquered brass pulls bring warmth and a slight vintage resonance that pairs well with both stained and painted finishes.
Most standard 1970s dresser pulls use a center-to-center measurement of 3 inches or 96mm. Measure before ordering replacements. Hardware is widely available online and at specialty home improvement retailers, typically ranging from $1.50 to $12 per pull depending on material and finish.
Common Mistakes to Avoid
- Skipping the cleaning step: sanding over wax and grime ruins sandpaper and creates an uneven surface
- Starting with too coarse a grit: 60-grit is almost never necessary and removes more wood than you need
- Sanding across the grain: creates visible scratches that appear clearly under stain
- Applying stain over dust: always wipe with a tack cloth between steps
- Rushing drying time: under-dried stain or topcoat leads to bubbling and peeling
- Using oil-based poly over chalk paint: it will yellow the paint and create an unpleasant sheen
- Forgetting to label hardware during disassembly: mixing up screws from different locations causes frustration during reassembly
- Painting without priming on bare wood: bare patches absorb paint unevenly and require extra coats
Longevity and Maintenance
Keeping Your Restored Dresser Looking Beautiful
A properly restored solid wood dresser, finished with a quality topcoat, should require minimal maintenance for years. Keep wood furniture away from direct sunlight, which can fade stain and dry out the wood surface over time. Use felt pads on the bottom of any objects placed on top to prevent scratching the finish.
For day-to-day cleaning, a lightly damp microfiber cloth is all you need. Avoid commercial spray cleaners that contain silicone or petroleum distillates, as these build up over time and complicate future refinishing work. Once or twice a year, apply a thin coat of furniture wax or a wood conditioner like Howard Feed-N-Wax to keep the surface nourished and protected.
Forest Stewardship Council notes that well-maintained solid wood furniture can last for multiple generations when properly cared for, reinforcing the environmental argument for restoration over replacement.
If the piece eventually develops minor scratches, a touch-up marker in a matching stain color can make small surface marks nearly invisible. For deeper scratches, light sanding with 220-grit followed by a fresh application of stain and a single topcoat layer is all that is needed to restore the surface fully.
Refinishing Safety: Protecting Yourself During the Process
Environmental Protection Agency provides detailed guidance on volatile organic compounds in finishing products and the importance of working in well-ventilated spaces. Always wear a respirator rated for organic vapors when sanding, staining, or applying solvent-based finishes. Safety goggles and nitrile gloves should be standard equipment for every session.
Work outdoors when possible, or in a garage with doors open. When working indoors, set up a box fan in a window to draw fumes outward rather than circulating them back through your breathing zone. Dispose of oil-soaked rags properly. Oil-saturated rags left bunched in a pile can spontaneously combust; spread them flat to dry fully before disposal or seal them in a water-filled metal container.
Frequently Asked Questions
How do I know if my 1970s dresser is solid wood or veneer?
Tap the surface. Solid wood produces a denser sound. Look at the edges: solid wood shows consistent grain on the edge itself, while veneer reveals a thin decorative layer over a different substrate. Veneer is not necessarily inferior; high-quality veneer over a solid core is still worth restoring. Avoid pieces where the veneer is severely bubbled or delaminated over large areas.
Can I restore a dresser without a power sander?
Yes, though it requires more time and physical effort. A sanding block with sandpaper works well for flat surfaces. Progress through the same grit sequence you would use with a power sander. Expect hand sanding a full dresser to take two to three times as long as using a random orbital sander.
What is the best stain color for a 70s furniture makeover?
Medium walnut and dark walnut stains are consistently popular because they complement the grain patterns common in 1970s hardwood furniture, particularly oak and teak. If you are aiming for a modern look, ebony or jacobean stains create a dramatic, contemporary result. For a lighter Scandinavian aesthetic, natural or golden pecan stains work beautifully.
How long does a full dresser restoration typically take?
Most projects take two to three days spread across a weekend. Day one covers cleaning, disassembly, and initial sanding. Day two finishes sanding, applies stain or primer, and handles the first topcoat. Day three applies final topcoat layers, reassembles hardware, and allows full cure time. Rushing drying stages is the primary cause of extended projects.
Is chalk paint durable enough for dresser tops?
Chalk paint on its own is not particularly durable for surfaces that see regular use. Always apply a finishing wax or polycrylic topcoat over chalk paint on dresser tops and drawer fronts. Two coats of polycrylic over chalk paint creates a surface that resists daily wear reliably.
Do I need to strip the old finish completely before refinishing?
Not always. If the existing finish is in relatively good condition with minor scratches or dullness, scuff sanding with 150 to 180-grit is often sufficient to provide mechanical adhesion for the new finish. If the existing finish is peeling, cracking, or heavily alligatored, full stripping is necessary for a smooth result.
How do I choose the right furniture hardware for a restored vintage piece?
Consider the overall aesthetic you want to achieve. Modern matte black or brushed nickel creates a clean contemporary contrast against warm-stained wood. Original-style hardware in brushed brass reads as vintage-authentic and appeals to collectors. For painted pieces, ceramic or glass knobs add personality without competing with the paint color. Always measure the existing hole spacing before ordering replacement pulls.
What is the best way to protect a restored dresser long-term?
Apply a quality water-based polyurethane in two to three coats as your topcoat. Keep the dresser away from direct sunlight and humidity fluctuations. Clean with a slightly damp microfiber cloth and apply a furniture conditioner annually. Avoid placing hot or wet objects directly on the surface without protection.
Start Your Restoration Today
A 1970s solid wood dresser sitting in a thrift store is not a piece of forgotten furniture. It is raw material for something genuinely beautiful, durable, and valuable. The process of stripping back decades of neglect, revealing the grain underneath, and bringing it back to life with careful finishing work is one of the most satisfying DIY projects available to anyone with a weekend and a modest materials budget.
The skills involved in antique wood restoration, from sanding vintage wood correctly to selecting and applying the right finish, build on each other quickly. Your first piece will teach you more than any guide can fully convey. Your second piece will be noticeably better. By the third, you will likely be looking at your own furniture and wondering what it would look like refinished.
Whether you restore to flip for profit or simply to own beautiful modern furniture without paying modern furniture prices, the 1970s solid wood dresser is one of the most rewarding starting points in the entire DIY furniture world. Source carefully, prep thoroughly, and take your time with the finish. The result will last longer than anything you could buy at a furniture store today.
ABOUT THE AUTHOR:
Adeel Mushtaque is a passionate home decor enthusiast and hands-on DIY art creator who believes that stylish, character-filled living spaces should never require an enormous budget. With years spent sourcing, transforming, and lovingly refinishing thrifted and vintage pieces, Adeel brings a grounded, practical creativity to every project he tackles, inspiring others to see potential where most see junk. His work consistently proves that patience, the right technique, and an eye for timeless design are all it takes to turn overlooked furniture into the most talked-about pieces in any room.