
Bring Nature Indoors with These Stunning Botanical Projects
Moss wall art has quietly taken over modern home décor trends — and if you’ve ever seen one in a boutique café, spa, or cozy Airbnb, you know exactly why. The lush, earthy texture immediately softens a room and adds a sense of calm that typical wall prints just can’t deliver.
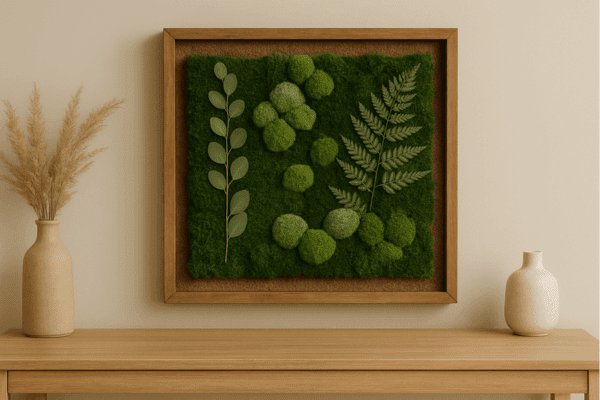
My first introduction to moss wall art happened inside a small, nature-themed café. A vibrant green moss frame hung above a wooden console, glowing softly under the ambient lights. It didn’t just look decorative — it felt alive. That moment encouraged me to try making my own piece at home, and once I did, I was hooked.
If you want to create soothing, organic wall décor without needing a green thumb, this guide will walk you through everything you need to know about DIY moss wall art — from choosing the right moss to building your botanical design.
🌿 Why Moss Wall Art Works in Every Style of Home
In a world filled with screens and constant stimulation, nature-inspired décor is gaining popularity for its grounding effect. Moss wall art fits beautifully with modern interiors and blends perfectly with styles like minimalist, Scandinavian, boho, and rustic.
✔ Biophilic design benefits
Adding natural elements to your home improves mood and reduces stress.
✔ No maintenance required
Preserved moss doesn’t need watering, sunlight, trimming, or soil — making it much easier than live plants.
✔ Adds texture and depth
Natural texture is one of the easiest ways to elevate plain walls. Moss pairs beautifully with DIY wall art ideas, textured accents, and simple natural décor.
✔ Highly customizable
You can create minimal green frames, botanical collages, or dramatic vertical installations depending on your style.
🌿 Types of Moss for Wall Art (Beginner Breakdown)
Not all moss is the same. Understanding the differences will help you achieve the look you want.
1. Preserved Moss (Most Beginner-Friendly)
Preserved moss is real moss treated to stay soft, colorful, and flexible for years.
Benefits:
- No watering
- Long-lasting
- Holds vibrant color
- Easy to shape
Best for:
Minimal botanical frames, natural accents, and textured art pieces.
2. Live Moss
Live moss grows slowly and has a fresh, natural look. It requires more care but works beautifully in humid spaces.
Benefits:
- Vibrant, living texture
- Ideal for bathrooms
Challenges:
- Needs misting and indirect light
- Best for humid environments
3. Popular Moss Varieties for DIY Art
✔ Sheet Moss — smooth, flat base layer
✔ Reindeer Moss — fluffy and dimensional
✔ Cushion Moss — dome-shaped and sculptural
Pro Tip: Combine sheet moss + reindeer moss + cushion moss for a layered, organic look.

🌿 Tools & Supplies You Need
You only need a few basic materials to make moss wall art.
Materials
- Preserved moss (mixed types look best)
- Wood frame, shadow box, or canvas
- Foam board or cork sheet
- Hot glue gun
- Scissors
- Optional accents: faux succulents, driftwood, eucalyptus, pebbles
Tools
- Tweezers
- Gloves
- Pencil + ruler
- Paper for layout planning
If you enjoy making DIY wood wall art, you can even build your own frame from pine or reclaimed wood.
🌿 How to Make DIY Moss Wall Art (Step-by-Step Guide)
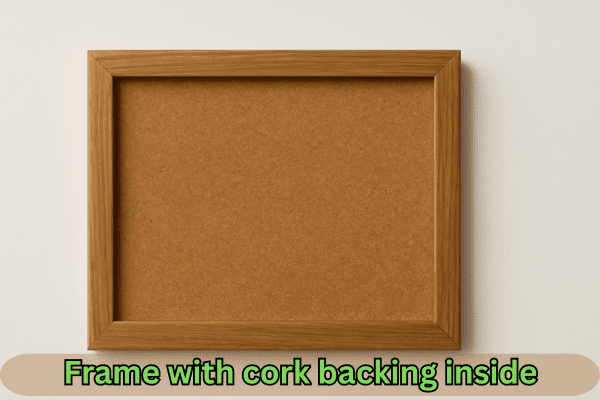
1. Prepare Your Frame
Choose your style:
- Rustic wooden frame
- Minimal shadow box
- Thin metal frame
- DIY wooden frame
Cut foam or cork backing to fit your frame and glue it securely. This helps the moss adhere properly.
2. Plan Your Layout
Before you start gluing, lightly place your moss pieces to map out your design.
- Use sheet moss for the background
- Add reindeer moss for texture
- Place cushion moss in high-volume spots
This planning step gives your piece depth and prevents gaps.
3. Attach the Moss
Work in small sections:
- Apply glue in thin, even lines
- Press moss lightly
- Overlap pieces for a natural flow
- Mix moss shapes and tones for contrast
Avoid pressing too hard — fluffy moss gives your art a softer, fuller look.
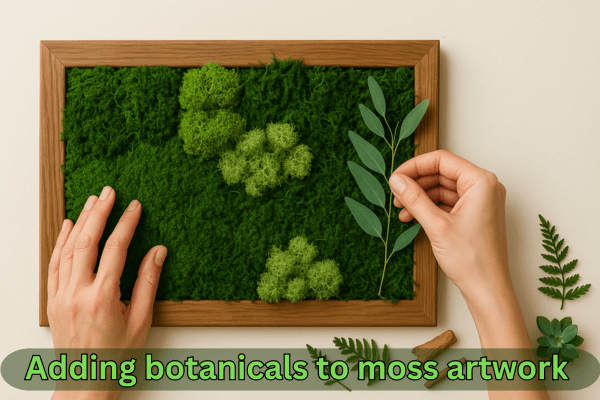
4. Add Botanical Accents
Enhance your piece using natural and faux elements like:
- Dried eucalyptus
- Mini driftwood branches
- Faux ferns
- Small succulents
- Natural stones
- Air plants
This step adds personality and makes your piece look more like a botanical sculpture.
5. Finishing Touches
- Trim stray edges
- Add backing paper for a clean finish
- Attach hanging hardware
- Display in a cool, dry place
Avoid direct sunlight or high humidity — both can affect preserved moss.
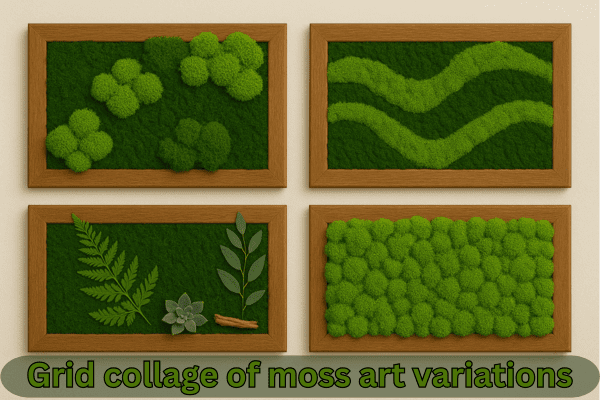
🌿 Creative Moss Wall Art Ideas You Can Try
Once you master the basics, experiment with advanced designs like:
✔ Moss monogram frames
✔ Circular moss mirrors
✔ Moss + driftwood collage
✔ Moss and fern botanical frames
✔ Minimalist moss arch art
✔ Moss terrarium shadow boxes
✔ Geometric moss panels
✔ Vertical hanging moss strips
✔ Moss designs paired with textured canvas art
These ideas also pair beautifully with other DIY wall art projects, helping you create a fully cohesive gallery wall.
🌿 Where to Display Moss Wall Art
Moss décor brings a calming, organic touch to almost any space:
✔ Living Room
A large moss frame above your sofa creates a natural focal point.
✔ Bedroom
Soft, minimalist moss panels add serenity to your sleep space.
✔ Bathroom
Live moss thrives in natural humidity.
✔ Entryway
Circular moss frames make a strong first impression.
✔ Home Office
Greenery helps improve focus and reduces visual fatigue.
🌿 How to Care for Moss Wall Art
Preserved Moss Care
- Keep away from sunlight
- Keep away from moisture
- Lightly dust when needed
- Do not water
Live Moss Care
- Mist weekly
- Provide indirect light
- Keep in humid rooms
With proper care, preserved moss lasts up to 8 years.
Designers worldwide love preserved moss wall art because of its rich texture, natural tones, and versatility for homes, offices or commercial spaces. preserved moss wall art: design ideas, benefits & care tips
🌿 Common Mistakes to Avoid
Avoid these issues for a polished, professional result:
❌ Overusing glue
❌ Using untreated moss
❌ Hanging preserved moss in humid areas
❌ Skipping the planning layout
❌ Exposing moss to direct sunlight
🌿 Final Thoughts
DIY moss wall art is more than a décor project — it’s a mindful creative experience that brings natural beauty into your home. Whether you prefer lush botanical textures or minimalist green accents, moss art instantly softens your space and adds warmth.
Pair your moss design with textured canvas art, geometric wooden wall art, or other handmade pieces to create a balanced, curated wall that feels personal and calming.
Your home deserves décor that feels alive — and moss wall art is one of the simplest ways to bring nature indoors.
🌿 FAQ: People Also Ask
1. How long does preserved moss wall art last?
Up to eight years without watering.
2. Can I mix live and preserved moss?
Yes — just mist the live moss areas only.
3. Does moss attract bugs?
Preserved moss doesn’t, as long as it’s stored and used properly.
4. What frames work best?
Shadow boxes, wooden frames, or handcrafted wood frames.
5. Can moss art be placed in humid rooms?
Live moss yes — preserved moss no.
🌿 About the Author
Written by Adeel Mushtaque, a DIY décor creator passionate about natural textures, handcrafted design, and simple home styling.