
Bathroom Shelves: The Complete Guide to Styles, Organization & Smart Storage
Bathroom shelves are one of those small decisions that quietly shape how your entire bathroom feels. The right set of shelves transforms a cramped, cluttered countertop into a calm, organized space — and the wrong ones leave you shuffling bottles every time you reach for the toothpaste. Whether you’re renting an apartment with zero wall-drilling permissions or renovating a master bath from scratch, there’s a shelf solution designed for your exact situation.
In my experience, most people underestimate how much storage potential their bathroom walls hold. That vertical space above the toilet, the dead zone beside the vanity, the awkward corner no one knows what to do with — all of it can become functional, even beautiful, with the right approach. The key is understanding which shelf types suit which spaces before you commit to buying anything.
This guide covers everything: the different types of bathroom shelves available today, how to choose based on your wall material and room size, what actually belongs on them (and what doesn’t), and how to keep them looking sharp for years. By the end, you’ll have a clear picture of exactly what you need — no guesswork, no costly mistakes.
Types of Bathroom Shelves: Finding Your Style
The market for bathroom storage has genuinely exploded in the past few years. Walk into any home improvement store and the sheer variety — floating shelves, freestanding ladders, corner caddies, over-door organizers, built-in recessed niches — can feel overwhelming. Breaking it down by function makes the decision much simpler.
Floating shelves are the reigning favorite for good reason. They’re sleek, flexible in sizing, and can be styled to match virtually any aesthetic. Freestanding shelving units (like ladder shelves or towel shelf combos) are perfect for renters or anyone who doesn’t want to commit to wall anchors. Recessed niches are the gold standard for shower organization — they sit flush with the wall and eliminate the soap-scum ledge problem entirely. And then there are shelves for bathroom storage that incorporate racks, hooks, and baskets all in one modular system.
One thing I’ve learned from organizing dozens of bathrooms: the best shelf type depends less on aesthetics and more on how you actually use your bathroom. A household with four people needs very different storage logic than a solo studio apartment dweller.
Floating Shelves for the Bathroom: The Modern Favorite
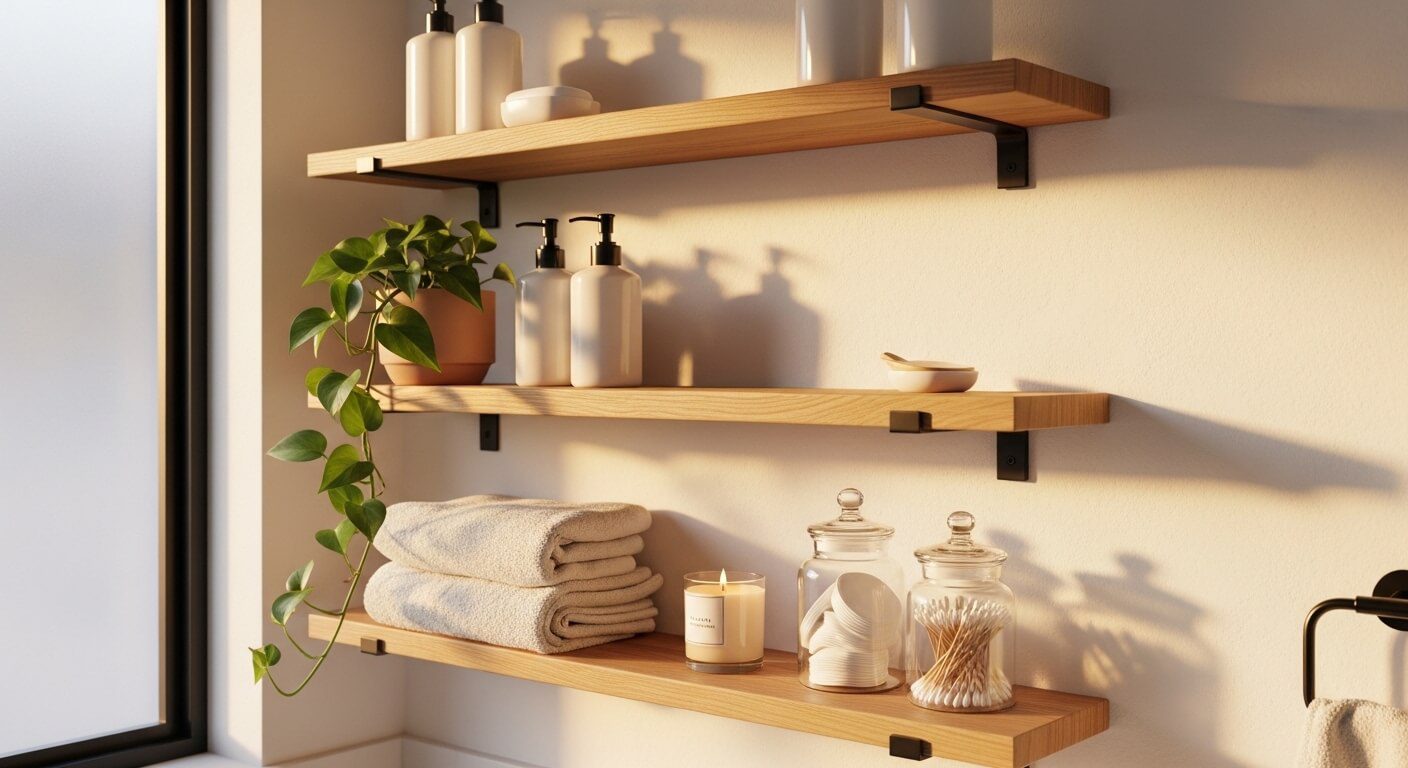
There’s a reason bathroom floating shelves dominate Pinterest boards and home renovation feeds. They’re visually light — they appear to hover against the wall without visible brackets — which is a massive win in small rooms where bulky furniture makes things feel cramped. A pair of floating shelves in bathroom spaces, installed at the right height, can hold a surprising amount while actually making the room feel bigger.
For a standard bathroom, floating shelves between 8 and 10 inches deep strike the best balance. Shallow enough to not overwhelm the space, but deep enough to hold a full-size shampoo bottle upright without tipping. Length depends on your wall — anywhere from 18 inches for a narrow accent shelf to 36 inches or longer for a full display and storage run.
How to Decorate Bathroom Shelves with a Floating Design
Decorating floating shelves in a bathroom is part function, part visual design. The classic approach alternates practical items (rolled towels, hand soap dispensers) with decorative ones (small plants, candles, a framed print). The rule of three works beautifully here: group items in odd numbers, vary the height within the grouping, and leave intentional negative space. A shelf crammed edge to edge loses that effortless, styled look entirely.
For material selection, solid wood with a sealed finish holds up well in non-shower bathroom zones. Avoid MDF near steam sources — it will warp within a year. For wet-zone proximity, consider teak, bamboo, or powder-coated steel. Glass shelves for bathroom vanity areas add a sophisticated touch and are surprisingly easy to keep clean, though they require sturdy wall anchors rated for the weight.
Bathroom Shelves Over the Toilet: Making the Most of Dead Space
The zone above the toilet is one of the most consistently underused storage areas in any home. Bathroom shelves over toilet placement turns roughly 3 square feet of dead wall space into a fully functional storage column — without taking a single inch of floor space. It’s one of the highest-return upgrades you can make in a small bathroom.
The standard placement puts the lowest shelf at least 24 inches above the toilet tank (roughly 42–48 inches from the floor), leaving enough clearance for comfortable use. From there, you can add two or three more shelves ascending toward the ceiling. Most over-toilet shelf units top out around 65–70 inches total height, which keeps the upper shelves reachable for most adults without a step stool.
Freestanding over-toilet units are particularly popular because they require no drilling. They straddle the toilet using adjustable side rails that rest against the wall for stability. The best models feel solid and barely move — the cheap ones wobble every time someone slams the door. If you go this route, look for units with solid steel or solid wood frames rather than hollow particle board legs.
Wall-mounted shelves over the toilet offer more stability and a cleaner look, but require locating studs or using appropriate drywall anchors rated for the load. If you’re storing storage bins full of backup supplies up there, make sure each anchor is rated for at least 30–40 lbs to be safe.
Bathroom Wall Shelves: Choosing the Right Material
Not all bathroom wall shelves are created equal, and the bathroom environment is genuinely harsh on materials. Humidity cycles between 40% and 90%+ during showers. Temperature swings. Cleaning products get splashed. The shelf you choose needs to handle all of this gracefully or it’ll look rough within a year.
Here’s a practical breakdown of the most common materials:
- Solid wood (teak, bamboo, oak): Beautiful and durable when properly sealed. Requires re-sealing every 1–2 years in high-humidity bathrooms. Teak is naturally water-resistant and the most forgiving.
- MDF with laminate: Budget-friendly and widely available, but notoriously vulnerable to moisture. Fine for powder rooms, risky near showers or baths.
- Tempered glass: Elegant, easy to clean, holds up perfectly in humid conditions. Glass shelves for bathroom use should always be tempered (not regular glass) for safety.
- Metal (chrome, brushed nickel, matte black steel): Extremely durable. Chrome can show water spots but polishes easily. Matte black is trending strongly and hides spots well.
- PVC or acrylic: Fully waterproof, lightweight, and inexpensive. Not the most attractive but ideal for inside showers or wet zones.
The connection between bathroom shelves and broader home organization is tighter than most people realize. The same principles that drive good pantry organization — grouping by category, labeling, using vertical space efficiently — apply directly to bathroom shelf organization. Think of your bathroom shelves as a mini pantry for personal care products.
How to Organize Bathroom Closet with Deep Shelves
Deep shelves in a bathroom closet are both a blessing and a curse. The extra depth means more storage — but without a system, things get buried and forgotten in the back. The single most effective fix is adding a second tier using small risers or stacking organizers that create a front row and a back row of items. Label both rows clearly. Rotating stock like toilet paper, shampoo, and soap should live in the back row so older supplies get used first.
Pull-out drawers or sliding baskets designed for deep shelves are another game-changer. You can find them at most container stores or online and they transform a deep static shelf into something much more functional. The same concept applies to closet organization ideas throughout the home — visibility and accessibility always beat raw storage capacity.
What to Put on Bathroom Shelves (and How to Arrange It)
What to Put on Bathroom Shelves: A Category-First Approach
The biggest mistake people make with bathroom shelf organization is mixing categories. Daily-use items end up buried behind decorative pieces, which means you’re moving things every morning just to find your moisturizer. A category-first approach solves this entirely.
Start by dividing your shelf space into three zones: daily use (items you reach for every day — toothpaste, face wash, deodorant), weekly use (shaving supplies, hair masks, backup toiletries), and display/decor (candles, plants, small art objects). Daily-use items get the most accessible shelf at eye level. Weekly items go higher or lower. Display items fill in the gaps visually without cluttering the functional zones.
For a polished look, decant liquid soaps and cotton balls into matching dispensers and glass jars. This is the single fastest way to make bathroom shelves look intentional rather than improvised. You don’t need expensive matching sets — even three white ceramic pieces from a discount store create visual cohesion.
For households managing a lot of cords and electronics near bathroom vanities, thinking about cable management under or behind shelf units keeps the overall aesthetic clean and prevents the “tech clutter” look that undercuts even beautiful shelving.
Cost Breakdown: Bathroom Shelves Across Budget Levels
Prices for bathroom shelving span an enormous range — from under $20 for a basic plastic over-toilet unit to several hundred dollars for custom built-ins. Here’s a realistic breakdown by category and budget tier:
| Shelf Type | Budget ($) | Mid-Range ($$) | Premium ($$$) |
|---|---|---|---|
| Floating Shelves (pair) | $15–$35 | $45–$90 | $120–$300+ |
| Over-Toilet Unit (freestanding) | $30–$60 | $70–$140 | $180–$400+ |
| Glass Shelves (per shelf) | $20–$40 | $50–$110 | $150–$350+ |
| Corner Shelves | $10–$25 | $35–$75 | $100–$250+ |
| Bathroom Shelves & Racks (combo) | $25–$50 | $60–$130 | $160–$500+ |
| Recessed Shower Niche | $40–$80 | $90–$200 | $250–$800+ |
The sweet spot for most homeowners is the mid-range tier. You get noticeably better materials, more stable hardware, and designs that look intentional rather than temporary — without the premium price jump that often reflects brand markup more than functional improvement.
Think about your bathroom shelving investment the way you’d think about under bed storage — it’s about maximizing existing space smartly, not necessarily spending more. A well-chosen $60 floating shelf set installed properly will outperform a $200 unit installed carelessly every time.
Common Mistakes to Avoid with Bathroom Shelves
I’ve seen these mistakes in renovations, in friend’s bathrooms, and honestly, in my own past projects. Most are easy to avoid once you know to watch for them.
- Ignoring load ratings: Every shelf and every wall anchor has a weight limit. Exceeding it doesn’t always cause immediate failure — it causes slow, progressive damage that leads to a sudden drop at the worst possible moment. Weigh what you plan to store before you buy.
- Mounting to drywall only: Standard drywall anchors work for light decorative items, but anything holding product bottles, towels, or bins needs to hit a stud or use heavy-duty toggle anchors. According to The Family Handyman, toggle bolt anchors rated for 50 lbs in drywall are worth the extra few dollars.
- Installing too high: A shelf you need a step stool to reach will never be used for daily items. Consider who uses the bathroom most often and install at their comfortable reach height.
- Choosing unfinished wood in wet areas: Raw or minimally finished wood near a shower will absorb moisture, swell, and eventually warp or grow mold. Always seal or choose naturally water-resistant species.
- Over-styling at the expense of function: Decorative objects are wonderful, but if they crowd out the practical items, you’ve just created a display case, not useful storage. Aim for roughly 60% function, 40% aesthetic.
- Forgetting to account for door swing: Shelves installed on the wall behind a swinging door are a disaster waiting to happen. Always trace your door’s full arc before marking wall positions.
Longevity & Maintenance Tips for Bathroom Shelves
With the right care, a quality bathroom shelf should last 10–15 years without issue. The bathroom environment is the challenge — consistent humidity, temperature swings, and cleaning product exposure wear down finishes and hardware faster than in any other room in the house.
Wood shelves: Wipe down monthly with a damp cloth and a mild all-purpose cleaner. Re-apply a water-resistant sealant or tung oil every 12–18 months in high-humidity bathrooms. Check mounting hardware annually for any signs of loosening.
Glass shelves: Glass is low-maintenance but shows everything. A microfiber cloth with a 50/50 water-and-white-vinegar solution keeps them streak-free without damaging the brackets. Avoid abrasive cleaners that can scratch the glass surface or corrode metal brackets.
Metal shelves: Chrome wipes clean easily with a damp cloth. For matte black or brushed finishes, avoid anything acidic or abrasive — it will strip the coating. Dry thoroughly after cleaning to prevent rust at joints or welds.
One consistently overlooked maintenance task is re-checking wall anchors every six to twelve months, especially in older homes where drywall can shift subtly with seasonal humidity changes. A shelf that felt rock-solid at installation can develop slight wobble over time. Tightening the mounting screws takes thirty seconds and prevents bigger problems. According to This Old House, most shelf failures in bathrooms trace back to inadequate initial anchoring rather than any shelf defect.
For households thinking about cohesive home organization beyond the bathroom, many of the same principles — vertical storage, labeled zones, decluttering by season — apply directly to closet organization projects throughout the home. Great organization is a transferable skill.
Frequently Asked Questions About Bathroom Shelves
What to put on bathroom shelves for both function and style?
The best approach is to layer practical and decorative items intentionally rather than randomly. At eye level, keep your most-used daily items: hand soap, a small tray with skincare products, or a rolled towel. Above or below that primary zone, add one or two decorative pieces — a small succulent, a candle, or a ceramic dish. The key rule is variety in height: don’t line up objects that are all the same size side by side. Vary tall and short, grouped and solo, and leave some breathing space on each shelf. Matching containers (all white ceramic, all clear glass) instantly elevate a collection of mismatched products into something that looks curated.
How to decorate bathroom shelves without making them look cluttered?
Clutter on bathroom shelves almost always comes from too many categories of items sharing the same space without a visual anchor. The fix is grouping — place items in clusters of two or three with clear space between groups. Use small trays or dishes as “containers within containers” to corral loose items like cotton rounds, Q-tips, or hair clips into single visual units rather than individual scattered pieces. Apply the 60/40 rule: 60% of shelf space should hold functional items, 40% should be intentional negative space or decor. When in doubt, take something off. A shelf that feels slightly sparse in your home will photograph beautifully and feel restful in daily use.
How to organize bathroom closet with deep shelves effectively?
Deep shelves require a two-row system to avoid the “black hole” effect where things vanish at the back and never get used. Place frequently used items in the front row and backup stock in the back row. Shelf risers, lazy Susans, or pull-out drawer organizers designed for deep shelves will transform the usability of the space immediately. Group items by category — all hair products together, all skincare together, all first-aid together — and label each zone. Quarterly, do a full empty-and-reassess: expired products leave, running-low items get moved to front, and the system resets cleanly. This is the same principle that makes pantry organization so effective — category logic beats “where did I put it” logic every time.
Are floating shelves actually strong enough for heavy bathroom items?
Yes — when properly mounted. The strength of a floating shelf is entirely determined by its anchoring, not the shelf material itself. A floating shelf anchored into wall studs with heavy-duty screws can hold 50–75 lbs without issue. A shelf anchored only into drywall with cheap plastic anchors will fail under 20 lbs. Always try to hit at least one stud when installing, and use toggle bolt anchors rated for the intended load when studs aren’t accessible. As a general guideline, a pair of quality floating shelves in a bathroom can comfortably hold several full-size product bottles, a set of folded towels, and decorative items simultaneously — the real-world loads are rarely as heavy as people fear.
What are the best bathroom shelves over toilet options for small bathrooms?
For small bathrooms, the over-toilet zone is often the only viable storage wall because all other walls are occupied by the vanity, door, or shower. Freestanding three-tier over-toilet units are the easiest starting point — no drilling, adjustable to most toilet sizes, and they add three full shelves of storage overnight. For a more permanent and polished look, two or three wall-mounted floating shelves in a vertical arrangement above the toilet tank create a custom built-in feel at a fraction of built-in cost. Keep the lowest shelf at least 24 inches above the tank, and use the upper shelves for lighter, less frequently needed items. In a small bathroom, vertical shelf stacking is your most powerful tool.
How do I prevent bathroom shelf materials from warping or molding?
Material choice is the most important decision. MDF and unfinished particle board will warp in a humid bathroom — full stop. For any shelf near a shower, tub, or in a naturally humid bathroom, choose solid wood with a sealed finish, teak, bamboo, tempered glass, PVC, or powder-coated metal. For wood shelves that are already installed, re-applying a water-resistant sealant annually dramatically extends their life. Ventilation matters too — bathrooms with good exhaust fans dry out faster after showers, which means shelves experience far fewer humidity cycles and last significantly longer. If you notice any surface bubbling or swelling at a shelf edge, address it immediately with light sanding and re-sealing before the damage progresses.
What’s the difference between glass shelves and wood shelves for a bathroom vanity?
Glass shelves for bathroom vanity areas offer a clean, contemporary look that makes small spaces feel more open because light passes through them rather than being visually blocked. They’re fully moisture-resistant and easy to wipe clean, but they show fingerprints and water spots more than wood. Tempered glass is essential for safety — it shatters into small rounded pieces rather than large dangerous shards if broken. Wood shelves bring warmth and texture that glass can’t match, and they’re more forgiving if something heavy drops on them. For a modern or minimalist bathroom, glass wins on aesthetics. For a warm, spa-like, or farmhouse-style bathroom, sealed wood is the better choice. Many bathrooms use both: glass near the vanity for its airy quality, wood on display shelves elsewhere for warmth.
Can bathroom shelves be installed on tile walls without cracking the tile?
Yes, it’s absolutely possible with the right drill bit and approach. You’ll need a carbide-tipped or diamond-tipped drill bit specifically designed for tile — standard wood or masonry bits will crack or chip ceramic tile almost immediately. Mark your drill point with painter’s tape to prevent the bit from sliding across the glazed surface, start at a very low speed without hammer action, and keep the tile wet or cool with water throughout drilling. Drill slowly and gently, never forcing the bit. Once through the tile, switch to a standard masonry bit to complete the hole into the wall substrate. Many installers also use adhesive mounting options or suction-cup systems specifically designed for tile, which avoid drilling entirely and work well for lighter bathroom shelves and racks.
Pulling It All Together
Bathroom shelves are one of the most impactful, most overlooked upgrades you can make to a home. The right shelving turns a stressful, cluttered morning routine into a calm and efficient one. It makes small bathrooms feel intentionally designed rather than makeshift. And the investment — even at the mid-range tier — is genuinely modest compared to the daily quality-of-life improvement it delivers.
Start with your problem: Is it countertop clutter? No vertical storage? A deep closet that swallows things? Match your shelf type to that specific problem rather than buying what looks good in photos. Measure twice, anchor properly, and choose materials suited to your actual bathroom humidity levels. From there, the organization system almost builds itself.
Once your bathroom shelves are dialed in, you’ll likely find yourself drawn to similar improvements throughout your home — the same thinking that transforms bathroom storage applies beautifully to pantry organization, bedroom closet systems, and even whole-home decluttering projects. Good organization has a way of spreading. And according to Psychology Today’s research on environment and stress, organized spaces genuinely reduce daily anxiety — which means a well-organized bathroom isn’t just convenient. It actually makes you feel better.